Hello Friends,
In this tutorial,we will understand
- What is Multi factor Authentication for your AWS account and Why it is required
- Steps to setup Multi factor Authentication for your account
Step 2 :
In this tutorial,we will understand
- What is Multi factor Authentication for your AWS account and Why it is required
- Steps to setup Multi factor Authentication for your account
What is Multi factor Authentication for AWS account and Why it is required
From official AWS Documentation, AWS Multi-Factor Authentication (MFA) is a simple best practice that adds
an extra layer of protection on top of your user name and password. With MFA enabled, when a user signs in
to an AWS website, they will be prompted for their user name and password (the first factor—what they know),
as well as for an authentication response from their AWS MFA device (the second factor—what they have).
Taken together, these multiple factors provide increased security for your AWS account settings and resources.
You can enable MFA for your AWS account and for individual IAM users you have created under your account.
MFA can be also be used to control access to AWS service APIs.
MFA can be also be used to control access to AWS service APIs.
Steps to setup Multi factor Authentication for your account
Step 1 :
Go to AWS
console and login with your username ,password.
Step 2 :
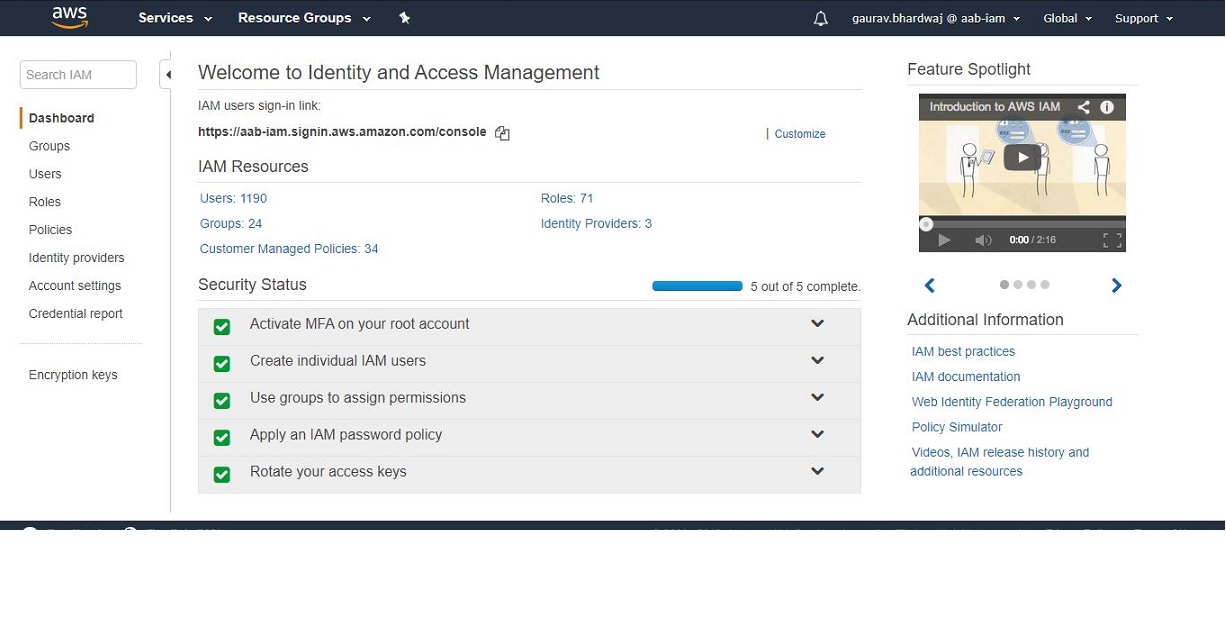
Go to Services -> IAM
Step 3 :
Click on Activate MFA on your root account
Step 4 :
Click on
Manage MFA button on the screen in Step 3.
Step 5 :
Click on
Assign MFA device. Select Virtual MFA device.
Step 6 :
Click
continue.
Step 7 :
Install
Google Authenticator app from Play store on your phone.
Step 8 :
Open Google
Authenticator App on your phone.
Step 9 :
Click on +
and then Scan a barcode from your phone.
Step 10 :
Click Show
QR Code on amazon console screen that has showed up from step 6 .
Step 11 :
Scan
bar code from your phone. It will show you authentication code. Put that code in
Authentication Code 1 box. Then 2nd Authentication code will be
displayed on your phone. Put that in the Authentication 2 box.
Step 12 :
Click on
Activate Virtual MFA and you will get following popup with success message for
assignment of Virtual MFA.
Step 13 :
Logout and open amazon console again and enter your username/password and click Sign in.
Step 14 :
Open Google
Authenticator app from your phone. It will show up authentication code. Add
that in the following screen and click submit.
Step 15 :
And you will
be successfully logged in.
Thanks for reading. Please share it with someone you think this might be helpful.
Feel free to post any questions in comments section or to share this post with anyone.
Also, if you like JavaSolutionsGuide and want to contribute, go ahead and
- Write an article
- Share with me at javasolutionsguide@gmail.com and
- See Your Article Getting Published on main Page of JavaSolutionsGuide with your name.


